Pages

Sunday, December 29, 2013

A Girly Affair


I'm always looking for alternative ways to display my favourite things on my vanity. Santy must have known I was eyeing this little beauty up for when I move out and get my own place, but for the moment, instead of being used for cupcakes I am going to use it for makeup and jewellery.


A gorgeous pattern of baby pink and lilac with gold and floral designs, it is the perfect girly touch for my otherwise all black desk area. Especially handy for your everyday pieces that you can have at the ready to speed up the painful morning process of applying our war paint for the day ahead.


On the top plate I have placed a few of my favourite jewellery pieces that I tend to wear a lot. Items too pretty to store away in a jewellery box. 


When the time comes, I will use this to display delicious cupcakes in my new apartment as I love to bake but I thought it was a cute idea you guys might want to try out for your vanity at home. Something like this could also be gorgeous with your favourite perfumes displayed in your bathroom.


Hope you like this. Love Jen xxx

Thursday, December 12, 2013

Secret Surroundings

Yesterday, me and Berto went for a nice walk in the crisp, cold weather here in Dublin. A little secret walk in the suburbs of the city was just what we needed to get some fresh air and out of the house for a while. Sometimes it's nice to get out of the city and the hustle and bustle of the Christmas rush and appreciate your secret surroundings. A perfect afternoon.


Wednesday, December 11, 2013

A Christmas Tale

Yes! We are home. We surprised our families and arrived on their doorsteps to everyone's astonishment. Trying to adjust back to Irish weather, not sure I'm ready to commit.

One thing I could not go without this year was decorating the Christmas tree. I do it every year in my family and couldn't break the tradition. It was also giving me major anxiety, thinking of all the decorations going in the wrong places, I know, OCD issues hehe. Here are some of my favourite decorations on our tree.

Hope you all have an amazing Christmas and get all the goodies your asking from Santa 

Jen xx


Thursday, September 26, 2013

How To Clean Your Makeup Brushes

So as you know, I am heading away, and on my adventure I could not got without some vital tools of my trade. Today I got around to cleaning ALL of my makeup brushes, personal and professional. It took a little while, but a couple of hundred brushes later and some definite wrinkle-finger syndrome, I am done!!

The majority of people who use makeup brushes to apply their war paint are very aware that they need to be washed regularly and shown a little bit of care and love. Unfortunately, a little bit of love can mean very different things to many different people. I have heard some horror stories about people washing their brushes. Filling the sink with water and throwing all the brushes in to 'soak'. Pulling at the bristles of the brushes. Leaving the brushes to dry standing up. Even a case of using bleach, yes I know, my heart stopped a little too, bleach!!
I have had many of my brushes for years and years and they still look, feel and do their job as if they are freshly out of their packaging, so I think I know a thing or two about cleaning and maintaining brushes. I'm not saying my way is right or that other ways are wrong, however, I have found this method to work for me and for my beloved brushes, abuse free!!

The only thing you need to clean your brushes are items you most probably have in your house. Warm water and some washing up liquid. You can use shampoo, baby shampoo, specific brush cleansers but I find washing up liquid to be the best. I use Fairy washing up liquid as it isn't too harsh on the bristles of the brush but yet it strips grease, oils, bacteria, and of course makeup, easily off your brushes.


Using warm running water, wet the brush with the bristles facing downwards so the water does not seep into the barrel of the brush, usually the silver area in between the handle and the bristles. Whenever emercing the brush under water, it should always be done in this way because if not, water will loosen the glue holding all the hairs in place, the hairs will fall out and ruin your brush and your makeup!
Squeeze a pea size amount of washing up liquid onto the palm of your hand. Using circular motions, stir the brush into the liquid until it begins to sud up. Rinse the bristles of your brush under warm water and repeat until the suds and water run white and clear. 


Be gentle with your brushes. You do not want to damage the bristles by being too rough or bending the bristles too much.
Now your brush is clean you want to dry the bristles. With the brush facing down again, wrap the bristles with your fingers and gently squeeze the water out. You do not want to pull at the hairs while doing this, just gently squeeze the bristles and shape the brush to its original shape.


When the excess water has been wrung-out, lay all of your freshly cleaned brushes out on a clean, flat towel in a cool dry place. This will allow the brushes to fully dry naturally in their original shape without the water dripping down into the barrel. Leave overnight. 
Your brushes are now squeaky clean to use on you or your clients. Let me know if you have any questions. Jx

Tuesday, September 24, 2013

Stripped Down

Sometimes things just need to be stripped down. I am IN LOVE with the new camera mode on the ios7!! Black and white photos are my all time favourite way to capture moments and memories in a classic and timeless way.


This past Saturday evening was my going away party for myself and my boyfriend. We are heading to south east Asia on the adventure of a lifetime and had a small party for all our close friends to say our last goodbyes. 
Ever since I saw these stunning gold barrel rings in H&M I could not stop thinking about them and now they are mine!! Some people like to wear a ring on each finger but I just love this layered look for something a bit different. 
The bracelet is also a H&M purchase, however it is a necklace that I just wrapped around my wrist to create a bunched effect. 
I also got my nails done that morning in 5th Avenue, Wicklow Street with a crisp white polish. I usually would get acrylic nails done but going away I thought just a file and polish will be perfect so I can change up the colours when I'm sitting on an exotic beach.

Starting to get really excited now!! Jx


Friday, September 20, 2013

A Winter Warmth

Here in Ireland, we've gone from a really nice summer into a bitter cold September like the click of a finger, so we never really got a chance to say goodbye to our rare hot summer. With fashion, beauty and makeup we're not fully ready to jump into our big cozy winter coats just yet.
Today on the eyes, I decided to blend out a classic smokey eye with a fun pop of bright colours to bring a bit of life and that last bit of summer into your makeup without being too much.
       

I personally love playing around with colours to change up a neutral eye. On today's eye I blended out a brown and black smokey eye with pink, orange, red and purple to achieve a warm effect to the overall look. I used the same fluffy blending brush with all of the colours as it doesn't matter if the colours mix.


I used a pink toned highlight under the brow to tie in with the colours blended and to add a bit of depth to the look. I also kept the rest of the face quite simple so it is all about the eyes! These colours can look great on all skin tones, just add a little at a time to achieve the effect your comfortable wearing.

Love Jx


Thursday, September 19, 2013

Trespassing Prohibited

The past six months I have had the privelege of working in one of the trendiest shoe shops in Dublin, Buffalo. For my last day, the beautiful girls I worked with allowed me to choose any pair of shoes I wanted as a goodbye gift. I know!! A girls dream come true!! Say hello to my new little beauties, the TBA Tresspass boots in Burgundy Leather.


These boots are so comfortable and are the perfect height for everyday wear. Leather lined, gold hardware and a sturdy rubber sole....what's not to love? Cut just below the ankle, the Tresspass Boot elongates the leg and can be worn with just about everything in your wardrobe. Be it skinnies, tights, or bare leg, these boots will be rocking those A/W trends hands down!!


A huge thank you to all my Buffalo Beauties for my amazing gift. Miss you already and love you all, Jx

Wednesday, September 18, 2013

Autumnal Shades of Berry

Hi guys!!

Definitely embracing coming into the Autumn/Winter (for the couple of weeks I'll be here anyway) and jumping straight on the bandwagon of the infamous berry lip. These Autumnal shades are an almost garaunteed trend every year. Definitely worth investing in a the perfect lippie for you and your wardrobe, after all, you'll be seeing it next year and for years to come!


I however won't be embracing for too long as me and my other half are heading on an adventure of a lifetime. We have packed in our jobs and are heading to south-east Asia for 4-5 months and then hopefully settling down in Spain. Lots of updates and blogposts from all around the world to be made!

Love J xx

Saturday, July 27, 2013

See Stars in Her Eyes

In the summer months, our makeup doesn't tend to stay on our face as well as other months of the year, so we need a little helping hand when it comes to staying put all day long. I've put together some of my favourite eye products I've been using the past couple of months to keep those eyes looking fresh till dawn.


An eyeshadow primer is vital in these summer months to keep your eyemakeup lasting all day. The lids of the eyes can get naturally oily,  no matter what skin type you have, so to control these oils a primer must be used. I love MAC Paint Pot in the shade Painterly for my skin, however this is a very light shade so it won't suit all skin tones. There are primers specifically made for the eyes which are good such as the Urban Decay Primer Potion or Inglot Eye Primer amongst others but I find the Paint Pots work wonders with soaking up any excess oils. Concealers can be used also but I would avoid using them if you have very oily lids.

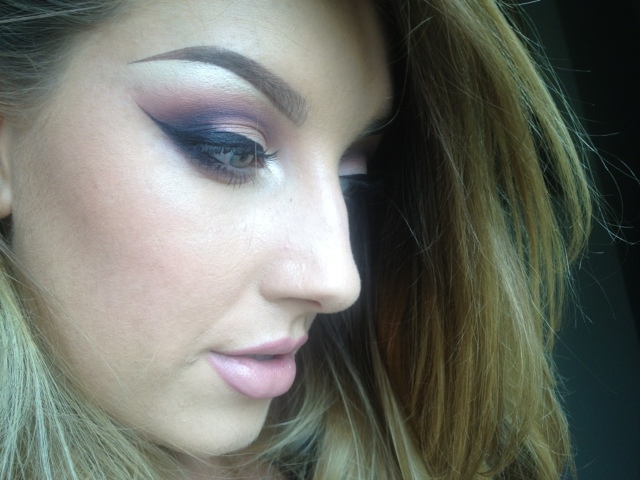
If you know me at all, you know that eyebrows are, in my opinion, the most important part of your makeup. They lift the eyes, frame the face and really finish a look, if done right. I love using MAC Gel Eyeliner in the shade Dipdown to give my brows a defined, sharp look without being too much. I firstly define the arch and extend it into the tail. I then fill in the top of the brow, lifting it at the arch slightly to brighten the eye area. Using the excess on the brush I lightly fill in the outer half of the brow. Next, i use a spoolie brush to even out the colour and disperse some of that product into the inner part of the brow giving you a beautiful, natural ombré brow.
Using a gel liner through the brows in the heat is best as it is generally more water resistant than your average brow pencil or eyeshadow. This is perfect for if your out in the sun, in the pool on your holliers or just want your makeup to last that extra stretch.
Lastly for the brows, I am addicted to Catrice Eyebrow Filler. Like a mascara for your brows, this product has a small amount of pigment in it so when brushed through the brow hairs it adds a bit of colour as well as a beautiful texture. It also helps the brow hairs to stay in place keeping them perfect and sharp all day long.


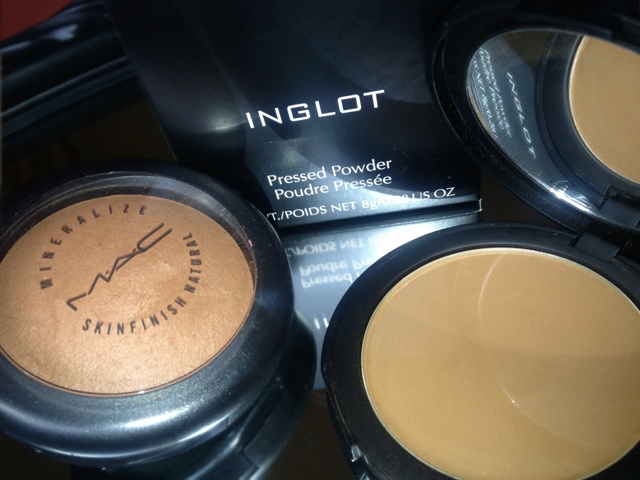
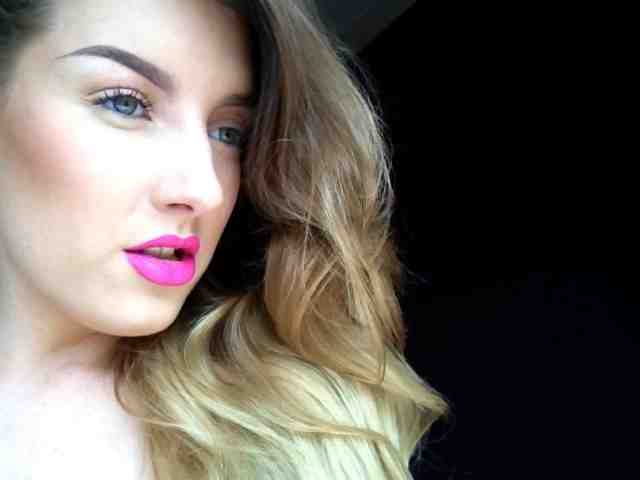
These days I am loving a simple eye with a colour pop on the lip, but we all need a little bit of colour on those lids, just to keep it interesting. Under the brows I love using MAC Pigment in Pink Opal, a soft pearlescent shade that can be applied sheer or packed on for a more intense colour! 
On the lid, to add an extra bit of glow and sparkle, I love the MAC Pressed Pigments. My favourite shade is Warming Heart, a perfect soft gold shade with an infusion of fine glitter. I bring this colour up to the crease of the eye with a dense synthetic brush to get the best colour payoff. A little bit of a matte brown, around two shades darker than your skin tone, into the crease with a fluffy brush works wonders. It will break up the sheen of your lid and highlight colour aswel as giving definition to the shape of your eye.

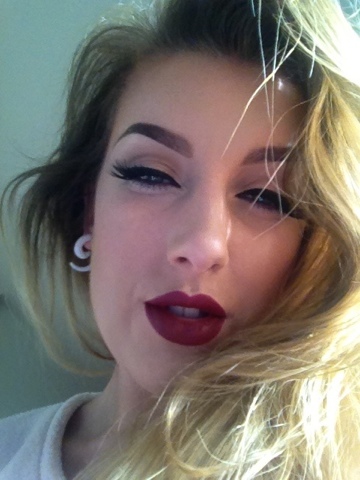
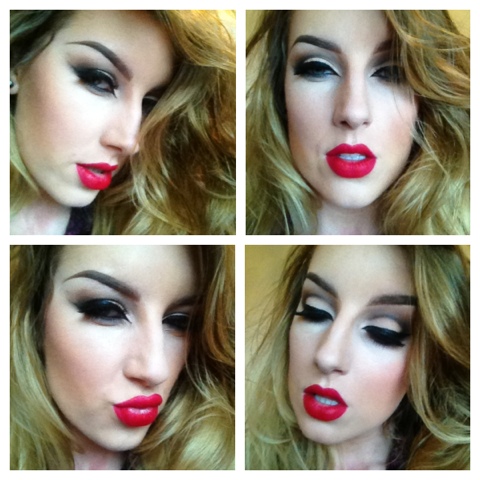
Most days I like to wear my eyes quite bare, but if I'm looking to put in a little extra effort I love to add a classic 50's flick to give extra definition and to shspe the eyes. To do this, I use Inglot Gel Liner in the shade 77. This is by far my favourite eyeliner to use as it is jet black and it is 100% waterproof so it can be used on the lid or waterline and it will last all night long! 
This product has one downfall. It does tend to dry out quite quickly in the pot. When this happens I use a droplet of Inglot Duraline and mix it in with a small section of the liner to cream everything back up again. Good as new!! 
Duraline can also be used as a primer, to pack on pigment or glitters and to add moisture into dried out products such as gel liners, matte lipsticks, mascaras ect.

And last but not least is my all time favourite mascara, the Inglot False Lash Effect Mascara. The brush in this mascara is probably the best I've come across. I'm not a fan of Inglot mascaras in general, but this one really lengthens your lashes, adds volume and is jet black. I also found this mascara to last very well. I have gas mine around four months and it has only dried out now. Usually, I find myself changing mine every few weeks but this one lasts amazingly!!

Any questions just ask
Jx

Thursday, July 25, 2013

Sun-Rays and Ritches

This summer has been a bit all over the place here in Ireland. Rain to start off with! No surprise there, and then into a scorching heat wave, and then greeted with tropical storms, we don't no weather to pack our RayBans or our brollies into that all in one handbag!!

Well I've prepared my favourite makeup products for this summer to keep your complexion covered in the rain or dewy in those rays of sunshine!!


FACE:

This spring/summer I have started to use the Maybelline Fit Me Foundation in the shade 210. I am usually used to a full coverage finish from Revlon Colourstay Foundation but thought a lighter finish would be nicer for the warmer months. Being a medium coverage, this foundation can be worn quite sheer or build up to a medium-full coverage so can suit for any surprises Mother Nature has in store for us. I found the colour selection in this range to be very yellow. Even the pink shades are still on the yellow side of the scales. So if you are a yellow toned beauty or love your tan to be straight from a bottle, this should be perfect for you! However porcelain or very pink toned ladies might want to steer clear!!

As I've opted for a lighter coverage foundation, I need a bit of concealer for those problematic areas such as under the eyes and around the nose. My choice of concealers is the MAC Studio Finish Concealer in NC20 (around 2 shades lighter than the 210 foundation from Maybeline). This concealer is of a fuller coverage so I apply it with a damp beauty blender to make it look more natural and blended.


Blusher, I think, is a must have for these summer days. A little flush of colour on the cheeks just brings that little bit of brightness to your face, honestly, it makes a world of difference! I just couldn't choose one colour to stick to, so I have my three favourite shades that I've been addicted to the past couple of months. Peaches, a beautiful orange toned coral colour, Fleur Power, a soft pink with a hint of peach, and Pink Swoon, a soft candy pink, all from MAC. They will change your life.......well, your face!!

One thing that is vital to give you the perfect glow is the highlighter!! Now before I go on, I must admit, I used to HATE highlighter on my face! The thoughts of it would send shivers down my spine! I would absolutely love it on other people and pile it on all of my clients but thought it looked like I was covered in sweat!! I am a changed woman! MAC Highlighter in Soft and Gentle is the most stunning soft, golden highlight that catches the light beautifully making your features stand out MILES!!


And finally, probably THE most important makeup item for the summer months is the Bronzer. To put over the foundation to warm up those cheeks, to put underneath the cheeks to contour beautiful shapes into the face or to wear with no makeup underneath just to give the face a bit of warmth when it's too hot to wear a full face of warpaint. I love MAC Bronzing Powder in Deep Dark for when I want a small bit of a glow to the skin or INGLOTs Face Powder in the number 31 if I want a matte finish.

Your face is now sorted for those unpredictable summer days, rain, sun or snow. Let me know if you have any questions.

Jx

Wednesday, June 12, 2013

It's a Fine Line to Love

Right now, I'm obsessed with winged eyeliner! Blended into a smokey, dramatic eye or paired with a bare lid and a colour pop on the lip, I'm hooked!

My personal preference would be the INGLOT Gel Eyeliner in the number 77 (jet black). A trusty reliable that lasts all day without smudging and can be used on the top and bottom waterline.


MUA Tip: I find a lot of makeup brushes are too thick to achieve the fine lines I'm looking for, so I often use fine paint brushes to apply the product. Thinner and cheaper! Can't go wrong!

Jx 

Sunday, June 2, 2013

Embrace Me!

Today I managed to master the concept of the fishtail braid, and it has to be said, it looks a lot more complicated than it actually is! As a first attempt, I don't think I did too bad!


To achieve this look, I'm afraid you do need to have long hair, preferably past your collar bone. Divide the hair into two pieces. Take a small amount of hair from the outside of one section and bring it into the inside of the other. Repeat on the opposite side. Use this method the whole way down the hair and you have yourself that tricky looking, beautiful braid. Easy right?

Optional:
I prefer this look quite worn-in and messy. Either do the braid the night before and sleep with it in style or simply after completing your braid, pull at each side of the plait to loosen both sides (I prefer this way).
This will also give the appearance of fuller, thicker hair as the braid looks a lot bigger when teased and pulled a bit.

Jx

Wednesday, May 29, 2013

He loves me, He loves me not!


Get the look:

This look is probably best with an almond shaped eye. If you have a hooded eye or the crease of the eye is not visible when open, you should definitely avoid this look. Instead you should focus the darker colours towards the lash line and blend up into lighter colours. This will compliment your eye shape a lot more.


Face Products:

Foundation: Revlon Colourstay Oily/Combination Skin in Natural Tan and Sand Beige
Concealer: Maybelline FitMe Concealer 10 and Studio Finish Concealer NW15
Powder: Inglot AMC Powder 55
Contour: Inglot Pressed Powder 30
Blusher: MAC Melba Blusher and MAC Pink Swoon Blusher

Eye Products:

Brow Filler: MAC Eyeshadow Brun and Cork
Brow Gel: Essence Clear Brow Gel
Highlight: Inglot Eyeshadow 46
Lid Primer: MAC Painterly Paint Pot
Lid Colour: Inglot Eyeshadow 355
Crease Colours: Inglot Eyeshadow 329 and MAC Blusher Melba
Outer Crease Colour: Inglot Eyeshadow 63
Liner: Inglot Gel Liner 77
Mascara: Inglot False Lash Mascara

Lip Products:

Lip Liner: MAC Boldly Bare Lip Liner
Lipstick: MAC Honey Love
Lip Gloss: Inglot Lip Duo 30

Tuesday, May 28, 2013

Are you Yum Yum for Candy?

Don't get me wrong, I've always been a fan of a bright matte pink lip.....just never on me! I looked at people on the street absolutely rocking the Barbie pout, and I was jealous!

Coming into the summer however, I was getting sick of my signature red lip, so yes people.....I bought MAC's infamous Candy Yum Yum, and I'm in love!!

Are you Yum Yum for Candy??

Jx 

Monday, May 27, 2013

Finger Armour Fun

Coming into this summer it's all about accessorising with pops of colour. Turquoise is making a huge comeback this season and how better to wear this trend than with this full finger armour ring from H&M. I'm in love!!


Wednesday, February 6, 2013

Get the Look

I kind of did this look a bit backwards. I would usually do the eyes first so if there is any fall out, it can be easily wiped away without effecting your foundation, but due to this look having very natural colours on the eyes, I decided to do the face first.

The face:

I started by using the F55 small duo fibre foundation brush from Sigma and Revlon Photoready Airbrush Mousse Makeup in the colour Shell to the cheekbones, forehead, chin and underneath the eyes. I then used the same foundation in the colour Natural Beige on the rest of the face as this shade matches with the tone of my neck. This means any areas of the face covered with the shade Shell are naturally highlighted giving the face a more airbrushed look.
Using the same brush, I stippled a small amount of MAC NW15 Studio Finish Concealer underneath the eye area, around the nose and a small amount through the cheeks just to add a bit more coverage as these areas can tend to get a bit red throughout the day.
To set the foundation and to mattify the skin I used Inglot AMC Powder in the number 55 all over the face and contoured the forehead, nose, lip and cheekbones with Inglot Pressed Powder in the number 31 and a Sigma F35 tapered brush.
I applied a mixture of MAC Pinkswoon and MAC Fleur Power blusher to the apples of the cheeks using a Sigma F15 duo fibre blush brush to give the cheeks a more rounded appearance.

The eyes:

You want to achieve the 'no makeup' makeup look with the shadows on the eyes. Similar to contouring you want to create seamless shadows and highlights, so blending is key.

I firstly filled in the brows using an Inglot 17TL brow brush and Inglot 329 chocolate matte brown eyeshadow. I paid extra attention to the arch and extension of the tail and used very little product on the inside of the brow. This makes the brow appear more natural. To achieve a clean, sharp brow I carved out the underneath of the brow line using a flat concealer brush and Studio Finish Concealer in NW15. This colour is a few shades lighter than my skin tone so it will act as a natural highlight to the brow bone.

Using my ring finger, I applied MAC Painterly Paintpot and blended it from the lash line into the concealer underneath the brow. This will act as a base/primer to the eyeshadow and brighten the lid, yet still giving coverage to any blue undertones on the lid.

Using a large fluffy brush, I used an Inglot 4SS blender brush, and I applied Inglot 352 matte pale pink eyeshadow on the full eyelid. Using the same brush (because it's tapered) I applied a shade 2-3 shades darker than the lid colour to create a shadow effect and give definition to the crease. I used Inglot 357, a wam matte neutral tone to do this.

I used my favourite liner, Inglot 77 black gel liner, to create the classic 50's flick eyeliner look, making sure it was a thin line on the inside, getting thicker at the outside corner of the eye and extended out into a tapered flick towards the tail of the brow.

Lashes:

I removed the Inglot 16N lashes from the box carefully from the outside corner of the lash using a tweezers. I was extra careful doing this a I didn't want to distort the shape of the lash because this would effect how the lash sits on your eye making them unwearable. I then took some Inglot 22S long individual lashes and I attached these to the lashband of the 16N lashes at the outside corner using clear DUO Glue. I did this about a third of the way into the lash from the outside to achieve that winged, cat-eye lash look. I used the same clear DUO Glue to apply the lashes to the eye. Once set, I went over the lash band with the gel liner again.
I then applied Inglot False Lash Mascara and I wiggled the product through my own natural lashes. This application technique will weave your natural lashes into the false ones so the two sets of lashes appear as one and sit on top of each other comfortably.

The Lips:

I firstly applied a small amount of MAC Diva matte lipstick to the lips, not going too close to the natural outline of the lip. I then used Kryolan lip liner in the colour 910 to line the lip on the very outside of the natural lip line to give the appearance of a fuller lip. This is personal preference if you want your lips to appear fuller or not.

Thre ya have it guys!! Try it out yourselves

J xxx


Monday, February 4, 2013

Get the Look!! Channel your inner Monroe!!

Before I began this look, I firstly applied my oilatum moisturiser and let it sink into the skin for the duration of the eye application to allow it to work its magic!

Using an Inglot 4SS brush, I buffed MAC Prolongwear Concealer all over the lid from the lash line to the brow in the colour NW20 to act as an eye primer as this concealer does not crease.
Using an Inglot 17TL brow brush and MAC Fluidline in Dipdown, I carved my brow from the bottom of the arch and then downwards to extend the tail. I then cleaned off that same brush in a tissue and used it with MAC Cork eyeshadow to lightly fill in the inside corner of the brow to achieve an ombré effect. Using a Sigma F70 flat concealer brush, I then carved the underneath of the brow with MAC Studio Finish Concealer in NW15 to achieve a clean, sharp look and to act as a highlight to the brow bone.
I applied MAC Painterly Paint Pot to the lid from the lash line up to the crease using the same F70 concealer brush to intensify the colour of the eyeshadows. Then, using an Inglot 9S flat eyeshadow brush, I pressed 373 Inglot matte white eyeshadow all over the lid up to the crease, packing on the colour to intensify the brightness.
Using the same 9S brush, I dipped the tip of the brush into MAC Cork eyeshadow that we used earlier and I pushed this colour into the crease above the white, the whole way across the eye. I then used an Inglot 6SS brush to buff out this colour and extend it upwards. I then used a mixture of 329 Inglot matte chocolate brown and MAC Brun eyeshadow, a dark cool brown, in the crease using an Inglot 10S small blender brush to define the crease. I also brought this combination of colours underneath the bottom lash line the full way across the eye.
I lined the lid using Inglot 77 Gel Liner extending the line outwards from the corner of the eye into a thick flick and along the upper and lower waterline. Again using the 10S blender brush I defined the outside corner and outer corner of the crease with a matte black, Inglot 63 eyeshadow. Don't be afraid to go over the liner a little.
I then applied some false lashes. I used Eyelure 202 lashes for this look and applied them with clear DUO Glue, available worldwide. I then applied Inglot False Lash Mascara to my own natural lashes to weave them through the false ones making it look more natural.

On to the face:
My skin feels nice and hydrated now so I can go straight in with my foundation. I dampened my Beauty Blender first and used this with my MAC W10 full coverage foundation and applied the product to the centre of the nose, the middle of the forehead, under the eyes and onto the cheekbones. I used the Beauty Blender to stipple this product right into the skin so there is no residue of any oils on the surface of the face.
I then used MAC NW35 full coverage foundation and the same sponge and applied it to the rest of the face making sure the two colours are blended seamlessly.
Again , using the Beauty Blender, I stippled Maybelline Fit Me concealer in the colour 15 underneath my eyes to brighten the area.
To set all the liquids on the face, I used Inglot AMC Powder in 55 and used my Sigma F25 to apply this to the whole face.
To contour I used my Sigma F35 and Inglots No.30 Pressed Powder underneath the cheekbones, around the hairline, down the side of the nose and underneath the bottom lip to give the illusion that these areas are more hollow. Use this product sparingly as it is very dark and highly pigmented so only a little is needed.
To add a bit of colour to the cheeks I applied Fleur Power Blusher from MAC using a Sigma F15 duo fibre blush brush. This I applied along the cheekbone to achieve the illusion of a natural lift to the face, especially for mature skins.

I lined the lips with Inglot 58 lip liner, focusing slightly on the outer edge of the natural lip line to achieve a fuller lip. I filled in the lips with MAC RubyWoo matte lipstick.


And there ya have it guys. All the steps you need to channel your inner Monroe! xxx